Today I made “Amish Oatmeal”

As Salaamu Alaikum and howdy all.

Today I made Amish Oatmeal.  This is a custard-style baked dish that is perfect to serve anytime.  I like it in the morning because it is hearty and keeps you full for a long time.  Great for the kids who are in school all day.  This particular recipe is not too sweet, which I like.  You can actually drizzle it with honey or maple syrup if you want to make it a bit sweeter.

I got the recipe from here:

Amish-Style Baked Oatmeal

2015-03-21 09.43.46

This calls for oats, brown sugar, butter, eggs, milk raisins, apples, and walnuts.  I also added some coconut to mine.

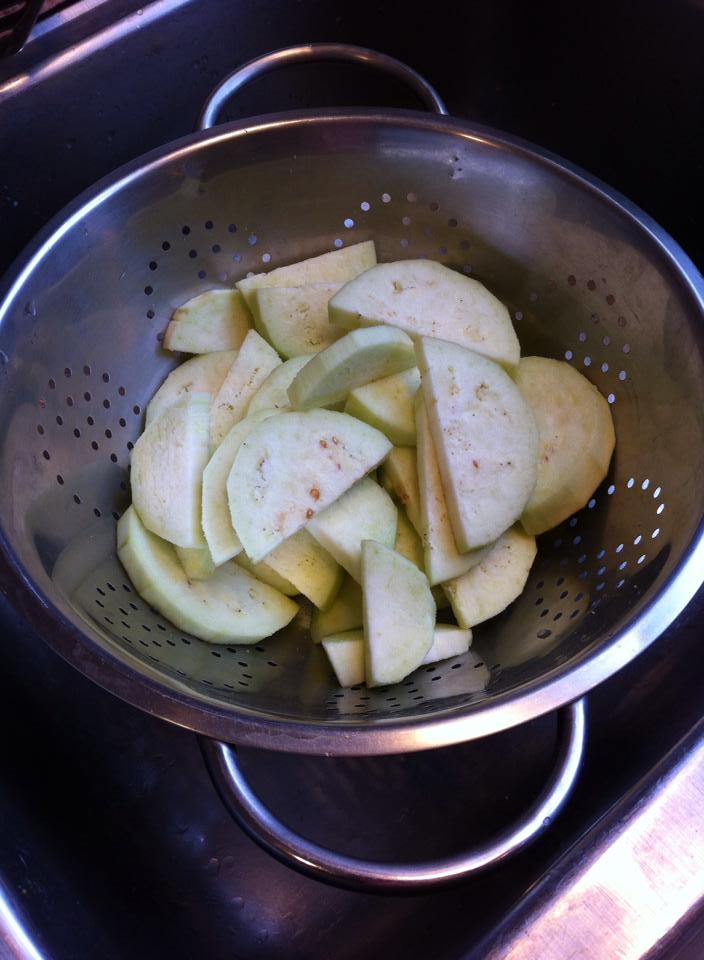
First, I peeled the apples and then sliced them. I used two Granny Smith, but you can choose a sweeter apple if you like.  I had an extra apple because I overestimated how many I’d need.  Snack for me later!

2015-03-21 09.50.05

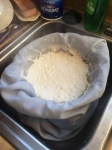
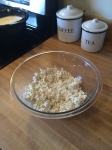
Then I mixed the dry ingredients.  2 cups of old-fashioned oats (quick oats would mush out too much), 3/4 cup of brown sugar, 1/2 a cup of walnuts (other 1/2 a cup gets sprinkled over the mix when it’s in the dish), 1 cup raisins, 1/2 tsp salt, 2 tsp cinnamon (I also added 1 tsp cardamom which is not in the other recipe), 1 tsp baking powder, and 1/2 a cup of coconut (also my own addition).  Make sure that if your brown sugar is clumpy that you break up the clumps.

2015-03-21 09.56.15

In a separate bowl, I put 2 cups of whole milk, 2 eggs (fresh from my hens, thank you ladies), 1 tsp vanilla, and 4 Tbsp of butter that was melted and allowed to cool a bit.  You can dump the wet ingredients into the dry or the dry into the wet, make no difference.  Mix up well to combine.

2015-03-21 09.59.11

Now, before you started all this (you DID read the recipe link, right?), you should have preheated your oven to 325 degrees and grease a casserole dish.  Did you, well, did you?  No?  Well go get heatin’ and greasin’.  Don’t worry, I’ll wait (cue Final Jeopardy music).

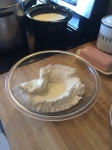
Okay, so put the apples into the base of the casserole and then dump all the oatmeal mixture into the dish and smooth out with a spatula.  Top with the other 1/2 cup of chopped walnuts, then slide into the oven for about 45 minutes.

2015-03-21 10.00.262015-03-21 10.02.33

Once it comes out, you’ll need to let it cool down for twenty minutes or so, lest you burn the top of your mouth.  Yeah, ouch. After that, just grab a bowl and a spoon and serve some up.  If you want to make it a treat, drizzle with honey and maybe even serve a scoop of vanilla ice cream on the side.

2015-03-21 10.50.292015-03-21 12.52.22 

And that’s it!  Didn’t take long to mix this up, and probably it won’t take long for my family to eat it up.  That bowl there was mine and I finished it right up.  Enjoy! Bil hana wa shifaa.

Gibnah Baydah – White Cheese with Blackseed

As Salaamu Alaikum wa Rahmatullaahi wa Barakaatuh – Peace be upon you, and the mercy of Allah and His blessings!  It’s easy to say once you get the hang of it and the blessings of sharing this phrase are immense!

Good morning!  It’s a sunny Saturday morning here in Virginia.  Very cold, but the wind is not blowing so it’s not too bad if you are well bundled and stay in the sun.  Or if you stay inside, which is where I am right now.

I woke up this morning with thoughts of making yogurt and cheese.  For once in my life, I had everything I needed at hand, so I was able to get started right away.  Well, right away after I started the coffee brewing.

Last night I was watching an episode of “Diners, Drive-ins, and Dives” and Guy Fieri was visiting a restaurant where the man was making international cuisine, including Middle Eastern stuff.  He made a delicious simple cheese that I’ve made several times before so I decided I wanted to make it this morning.  And so here it goes:

What you will need:

1 gallon whole milk
juice of two lemons
1 cup of all natural yogurt (I use Dannon All Natural if I don’t have home made in the house)
salt
herbs such as black seed (haba soda), mint, oregano, dill, etc. (optional)
strainer or colander
cheesecloth or finely woven cloth such as a pillowcase
large bowl

In a large, tall-sided pot, heat one gallon of milk to the boil.  You will either need to use a really big pot or watch the pot like a hawk to avoid having a messy boil-over.  I suggest watching it like a hawk.  As soon as the milk starts to foam up and rise, add the juice of two lemons and the cup of yogurt.  Give it a quick mix with a wire whisk.  Allow to boil for a minute or so – the risk of boil-over is gone once the milk starts to break up into curds – and then remove from the heat.

I put a big stainless steel bowl in the sink and then rest a big stainless steel colander inside that, and line the colander with cheesecloth or my personal favorite, a (clean, never used for a human head) pillowcase.  Very carefully, using pot holders, grab the handles of your big pot and pour the contents into the colander.  Set pot aside.

Raise the colander a bit because probably the amount of liquid will be a lot and it will “float” the colander unless you empty most of it out.  DO NOT THROW AWAY THE WHEY.  Or, DO NOT THROW A-WHEY THE WHEY!  Pour it into another container and then put the colander back into the bowl.

Allow the cheese to drain for about twenty minutes.  You can twist up the pillow case to squeeze out the last bit of liquid if you want to, but I don’t bother because I like my cheese a bit moist and I don’t want to burn my hands.  Once it is drained to your satisfaction, dump the cheese into a bowl and put the pillowcase in the laundry.

Now you can add salt and whatever herbs you like.  A classic addition is blackseed, know by names as nigella sativa, habat al barakah, or haba saudah.  I mix it all in with my hands.  Try adding salt a little bit at a time, starting with one teaspoon and mixing well.  Taste before adding more so you don’t make it too salty.  Mix well and then enjoy!  My teenage son LOVES this cheese and it’s a good thing I got pictures before he woke up because it will probably be gone soon!

Bil hana wa shifaa.

Fried Eggplant With Tomato and Garlic and Pepper Salsa

As Salaamu Alaikum.  Wow, I haven’t used this blog in a LOOOONG time.  I love to cook and bake, but with the frantic pace of my life this last year I haven’t had time to write things down.  Oh, yeah, I can snap a few pictures and post it to my Facebook, but write out a recipe?  Maybe after the last kid is in school and we start wearing disposable clothes!  But I did make fried eggplant last night and people on my FB are asking for the recpie, so as long as I’m procrastinating from doing real work I may as well procrastinate productively!  So here it is:

Fried eggplant.  For this recipe you will need one large purple eggplant, two beefsteak tomatoes, three cloves of garlic, and one jalapeno pepper.  In addition, you will need some salt and vinegar, plus oil for frying.  And if you don’t have good pita bread to eat this with, run out and get some real quick!

First you cut the ends off the eggplant and then peel it:

eggplant1

Then you cut the eggplants. You can simply slice them into rounds about 1/8″ of an inch thick, or slice the eggplant longways first.  I slice the eggplant longways and make smaller half-circle pieces because I can fit more into the frying pan at one time that way:

eggplant2

Next, I lay the pieces flat on my cutting board or counter and I sprinkle them liberally with salt on both sides.  This step is needed because larger eggplants can be bitter and this draws out the bitter liquid.  Then I place them into a colander to drain.  You can leave the colander in the sink or set it in a bowl to catch the liquid, which will be discarded unless you want to play a really mean prank on someone:

eggplant3 eggplant4

While they are draining, you can prepare the salsa.  Dice up two beefsteak tomatoes.  Peel and thinly slice three cloves of garlic.  Dice up one jalapeno pepper (you crazy heat lovers can use a spicier pepper if you are brave).  These are all going to get tossed together into the pan later so you can put them all in one bowl – go ahead, they won’t mind:

eggplant5 eggplant7

Now you need to rinse the excess salt off the eggplant slices.  Do this under running water, then rinse out the colander and put the rinsed pieces back into the colander to drain.  If you have one of those salad spinners you can use it to spin off the excess moisture.  After you do this, you will need to lay the pieces on a dry tea towel or on good paper towel to blot any remaining moisture.  You want them to be as dry as possible because water + hot oil is NOT a good combination:

eggplant8

Now get a large shallow pan and fill it with about 1/4″ of vegetable oil suitable for frying.  Don’t use your olive oil on this.  Olive oil has a lower smoke point so it will not work well in high heat frying applications.  Heat the oil to about high medium.  It should take about five minutes a side to fry; if it takes too long, it will absorb too much oil.  Too fast, and you have not so delicious charcoal briquets:

eggplant9 eggplant10 eggplant11

Fry the eggplants on both sides until golden brown. They should be a bit darker around the edges but not dark like the edges all the way through – unless you like them that way!  You might like yours a bit more well done, but remember if they go too long – charcoal!  And charcoal is not a good flavor.  I’m just sayin’.  Remove them to paper towel to drain.  After they are drained, put them on a nice plate for presentation:

eggplant12

Okay, now for the salsa.  Tip almost all of the oil out of the pan, using great care because it is very hot.  Put the pan back on the heat, and then dump in the tomatoes, garlic, and peppers.  Sautee for about a minute or two on high heat until it starts to soften, stirring often, then add about 1/4 cup of vinegar.  I like apple cider vinegar.  Be careful not to breath in the vapors because  you WILL start coughing if you do, especially if you used spicier peppers (voice of experience here).  Continue to sautee and stir for another minute or so until the mixture has no free liquid splashing about and has thickened a bit, then simply layer it overtop the eggplant.  That’s it, you’re done!  Now take that really good pita bread you bought (or made, using my old recipe here) and tear off a piece to use as a scoop.  Scoop up a small portion of the eggplant with salsa and say Bismillah, then pop it into your mouth and sigh happily.  Well, that’s what I did, anyway :).

In the real world, one eggplant makes enough for two to four people.  Two if you are normal, four if you are trying to be polite and not steal the plate and run off and eat it all by yourself.  I would recommend that you don’t make this more than once a month – eggplants (and tomatoes, for that matter) are members of the nightshade family of plants and should be enjoyed in moderation.

Bil hana wa shifaa!

Biscuits and Turkey Sausage Gravy – a Stick to Your Ribs Breakfast

Okay, so this morning I woke up and decided to make biscuits and gravy for breakfast.  It’s a really sturdy breakfast, preparing you for a long day of lumberjacking or folding laundry while chasing a toddler who likes to knock nicely folded clothes off the bed.  You know, heavy work.

My first confession is this:  I used store-bought biscuits.  There, I said it.  I have yet to find a good, tasty, toothsome, fluffy biscuit recipe so I simply break out the can from the fridge, crack it open, and stick them in the oven.  No muss, no fuss, don’t tell Martha Stewart.

The gravy I make from scratch.  First, in a large shallow pan, I fry up one pound of turkey sausage. Being Muslim, of course I don’t eat pork, so I will always use a turkey, beef, or lamb substitution for any sausage or bacon that a recipe calls for.  Since turkey sausage is usually very low in fat, I put a couple of teaspoons of oil in the pan before frying it up so it won’t stick.  When it’s nicely browned, I set it aside and save it until I’m ready to put it in with the gravy.

For the gravy, you will need to make a roux.  I know some people are intimidated by this but it’s actually very easy.  Use equal parts butter and flour.  That’s the rule of thum.  I use a medium size pot, put in 1/4 cup of butter (or in this case, leftover beef bacon fat from a breakfast earlier in the week), and let it heat up over medium heat.  When the butter has melted and it has stopped foaming up, add 1/4 cup of all purpose flour and whisk it in briskly until combined.  It might be a little clumpy but it will smooth out.  Allow it to brown for two to three minutes so the “floury” taste cooks out of it.  It should start to turn color just a bit and it will have a nutty flavor.  Then whisk in about two cups of cold milk.  Keep whisking briskly until everything is well combined and there are no clumps of flour in the mix.  Turn the heat up to high.  Whisk in another two cups of milk and then use a mixing spoon to get into the corners of the pot since bits of flour get trapped in there that the whisk cannot reach.

You can set aside the whisk now and just use your spoon.  Stir lightly but constantly as the mixture heats, being sure to get into the corners.  The gravy will start to thicken as it approaches the boiling point.  As soon as it does, to avoid having little volcanoes popping off and splattering you with gravy lava, reduce the heat.  Keep stirring and then add salt and pepper to taste.  You will need more salt than you think you do, but remember you’ll be putting somewhat salty sausage in in a minute so don’t put too much.

Once the gravy has thickened, add in the crumbled sausage and stir to combine.  Lower the heat to a bare simmer and put on the lid, allowing everything to come together for a few minutes.

That’s it.  You just made gravy!  Now you just have to split open a couple of biscuits and ladle the scrumptious sausage gravy over it, and enjoy.

Bil hana wa shifaa!

This slideshow requires JavaScript.


Published in: on January 15, 2012 at 9:51 am  Leave a Comment  
Tags: , ,

Basic Dinner Rolls – Gone in an instant!

I’ve made these dinner rolls three times this week.  As usual, they disappear in about five minutes.  The recipe is very basic.  You don’t have to make these into rolls.  You can make two big round loaves, use a loaf pan, or shape them into twists.  I like the little rolls.  They’re easy to shape and the right size for kids to grab.

Dinner Rolls:
5-1/2 to 6-1/2 cups of all-purpose flour
1 cup milk
1 cup water
1/2 cup butter
2 teaspoons salt
2 tablespoons active dry yeast
1/4 cup sugar
1 egg, lightly beaten
1/4 cup melted butter with 1 tsp dried oregano and 1/2 tsp garlic powder for brushing over finished bread (optional)

First, gather and measure out all your ingredients so you know you have everything you need.  Nothing is worse than getting started making bread and then realizing you are out of yeast or you used the last egg for hubby’s breakfast.  Measure half of the flour into the bowl of your stand mixer (or big bowl if you will be mixing and kneading by hand).  Add the yeast, sugar, and salt and mix up a bit.  Set aside.

In a small pot, add the water, milk, and butter and heat until the butter has melted.  It is very important to not heat it too much, or to let it cool down to the correct temperature, before adding this to the flour.  The liquid needs to be at a temperature of between about 86 degrees and 104 degrees.  Too cool and the yeast will not activate; too hot and the yeast will be killed and your bread will never rise.

Put the bowl with the dry ingredients onto the mixer and attach the mixing paddle (not the dough hook).  Set the speed to one and slowly add the liquid.  Let it mix in and then add the egg.  After this incorporates, turn the speed to medium or a bit higher and allow it to mix for about three minutes.  This starts to activate the gluten, that sticky stuff that provides a strong framework for your bread to rise.  After three minutes, turn off the mixer and replace the paddle with the dough hook.  Add a little less than three cups of flour and turn on the LOWEST speed and allow to mix in.

The consistency you are looking for is fairly firm and pulling away from the sides of the bowl.  The dough will be tacky but not very sticky.  This is where a “feel” for the dough is important, and your feel will develop over time.  If the dough is too wet, add flour about 1/2 cup at a time and let it incorporate fully before checking again.  You may not have to add any flour or you may need to add up to a cup.  It depends on how dry the flour is or even if it is a humid day.  The dough will crawl up the dough hook; this is fine.  If you need to stop the machine to scrape it down you can do that.

Let the dough knead in the mixer for five to eight minutes.  If you are kneading by hand, well, you’re my hero and you no doubt have big Popeye biceps.  You’ll need to knead by hand for a full ten minutes.  Once the kneading is done, stop the machine, detach the hook, and bring the bowl to your work table.  Sprinkle the surface with just a bit of flour and scrape out all the dough onto the table.  Knead it for just a couple of minutes to bring it into shape and then place it in a greased bowl to rise for up to an hour (in my warm kitchen today it only took about half that amount of time) Grease the top of the dough as well to keep it from drying and developing a crust (I use a spritz of cooking spray), and cover it with a clean damp towel or a small clean grocery bag.  After it has doubled in bulk, poke your fingers into it to pop out as many bubbles as you can and then put it on the table again and knead into a round.  Cut the round into fourths, and then cut each fourth into eight relatively even pieces (mine are certainly not Martha Stewart perfect, as you can see.  Please don’t tell on me.)

Each piece should be rolled into a ball.  I usually shape mine in my hand and then roll it in my cupped hand on the surface of the table.  A bit hard to describe but you can watch the technique here.  Place on 1/4 size sheet pans, 8 to a pan, and allow to rise again until doubled in bulk.

Preheat the oven to 400 degrees.  Carefully, so as not to deflate your lovely dough, place each tray into the oven.  Close the door gently, set a timer for 8 minutes.  After eight minutes, the rolls will not yet be done, but you will need to rotate the pans so they bake evenly.  That means the pans are turned 180 degrees and the pans on the bottom rack go to the top and the top to the bottom.  Then set the timer for six  minutes.  Check after this time to see if they are done.  I like my rolls to be a little darker so I gave mine eight minutes, but ovens can run a bit hot or cold so keep a close eye on them and take them out when they are medium golden brown or a little darker.

Set them on the counter and brush immediately with the melted butter that has the oregano and garlic powder.  You don’t have to do this step but trust me, it is delicious.  Let the rolls cool either on the pans or on a rack and then get out of the way as your family stampedes to get to them.

Bil hana wa shifaa!

This slideshow requires JavaScript.


Published in: on November 27, 2011 at 1:07 pm  Comments (2)  
Tags: , , ,

Mama Ganouj – Because why should Baba have all the fun?


Okay, I’ve been on an eggplant kick recently.  I love making baba ganouj, but I make mine a bit differently.  Mine has sweet and hot peppers in it, making it more spicy, so I have renamed it “Mama Ganouj”, because you know we ladies are more spicy than the guys :).  Enjoy!

1 large eggplant
1 large sweet red pepper
1 jalapeno pepper

1/4 cup tahini
juice of one lemon – Use fresh-squeezed lemons, not bottled juice!  In this dish, it does make a difference
2 cloves of garlic
salt and pepper to taste
drizzle of olive oil

Wash all your veggies.  Heat oven to 400 degrees.  Cut the eggplant in half lengthwise and place, cut side down, on cookie sheet covered with aluminum foil.  Cut peppers in half and remove seeds and the white membrane (leave membrane if you want it hotter).  Place peppers on cookie sheet with eggplant.  Place in the oven and roast for 45 minutes to one hour, until eggplant is soft.

Remove from oven.  Scrape peppers off into the bowl of a food processor with a chopping blade.  Pick up each half of the eggplant, placing it cut side up on a cutting board, and scrape out the flesh using a spoon.  You may want to wait until it has cooled a bit.  Discard skin, put flesh in food processor bowl with peppers.  Add the remaining ingredients except olive oil.  Put the lid on the processor and puree to a mostly smooth consistency.  Check the flavor while processing to see if you need more salt.  Add more seasoning if needed and then continue the puree.

Scrape the mixture out into an attractive bowl, drizzle the top with olive oil, and enjoy!  You can eat this either with soft pita bread, or crisp up the bread in the oven, or buy pita crisps or whatever you like to serve this with.  It will be a bit spicy and very rich.  Bil hana wa shifaa!


Published in: on November 24, 2011 at 10:26 am  Leave a Comment  
Tags: , , , , , ,

Challah Cinnamon French Toast

Ah, french toast. Warm, toasty, French. Well, maybe, maybe not. I don’t know if French toast actually originated in France. Don’t care, actually. All I know is that it tastes good. I just finished wolfing down a portion in a most unladylike fashion. I did restrain myself enough to not lick the leftover syrup off the plate.

2/3 cup of milk
2 eggs
1/2 teaspoon salt
1 teaspoon vanilla (I use alcohol-free)
cinnamon sugar mixture (optional)
four thick (3/4″) slices of challah bread

Heat up a large skillet or griddle to medium (about 325 on a griddle). Crack two eggs in a bowl, add milk, salt, and vanilla, and whisk to break up the eggs very well. Pour this mixture into a shallow dish – I just used a small frying pan but you can use a cake pan or pie pan. Put one piece of challah in the batter. Count to ten to allow it to soak up the liquid; flip and repeat. Pick up the bread carefully by a corner and allow to drain into the dish. Be careful! The bread is wet and may try to fall apart. I usually hold it gingerly with my fingertips. When it has drained, put it into the heated nonstick skillet or on the griddle which has been buttered or sprayed with cooking spray (I used cooking spray). If you have room for all four pieces, continue until they are all in the pan. I used a pan that could fit two or three pieces so I did mine in stages. Allow to cook for about two to three minutes on one side. While the first side is cooking, sprinkle the tops with a cinnamon sugar mixture. This is optional but I really like the taste, and it’s better than putting cinnamon in the batter because it tends to float on the top of the batter and get completely taken up by the first piece of bread, leaving the other pieces deprived and depressed.

When the first side is browned, flip to cook the other side for another two to three minutes. Remove from heat, place on plate, top with a dab of butter, then syrup. Add berries or bananas or whatever you like, and DIG IN!

Why challah? Well, challah is a rich egg bread. It holds together well and the inside has an almost “custardy” consistency when it is done. If you like a drier French toast, you can cut the bread a bit thinner or use a different type of bread. It depends on your personal taste and you can fiddle with this recipe as you like.

Bil hana wa shifaa!

This slideshow requires JavaScript.

Published in: on October 26, 2011 at 10:18 am  Leave a Comment  
Tags: , , , , ,

Foccacia Bread With an Arabic Twist

I just finished making this recipe for foccacia bread:

http://allrecipes.com/Recipe/michaels-foccacia-bread/detail.aspx

It was a pretty simple recipe. I didn’t have honey so I used sugar. Instead of using the herbs he suggested, I used zaatar. I also let it rise a second time after I had punched it down and put it in the pan to bake. I heated water in a kettle, put the hot water into a pan in the bottom of the oven, then put the dough in for about half an hour to rise in the warm, moist oven (with the heat OFF). Then I took it out, set the oven to 375, and baked for about 25 minutes.

The bread came out lovely and delicious. The chopped onions in the bread give it a tiny bit of sweetness when you chew. It is soft but toothsome, not a wimpy bread at all but not something you have to rip at like a vulture on a carcass. Here are some pictures of my method:

This slideshow requires JavaScript.

bil hana wa shiffa!

Published in: on October 3, 2011 at 2:03 pm  Leave a Comment  
Tags: , , , , , ,

Home Made Cinnamon Rolls – Rich and Decadent

Is this sweet enough for ya?

Okay, someone asked for my cinnamon roll recipe. Now, I used to work for a country style fried chicken restaurant called Grandy’s back in the day. I learned how to make the world’s BEST dinner rolls and cinnamon rolls under the tutelage of a Hawaiian lady named Lelani. She was a tough customer, let me tell you! The only way was the right way. I got over being intimidated by baking really fast. I used to make rolls and cinnamon rolls for up to 400 customers a day. You get big Popeye biceps doing that! Here’s how I made the ones I made yesterday that are causing a stir on my Facebook page :).

I should warn you that I use my KitchenAid mixer to do the mixing and folding of the dough except right at the end. You can do this all by hand but it will be more work.

Basic Sweet Dough

3-1/2 to 4 cups of all-purpose flour
1/2 cup sugar
1 teaspoon salt
3 tablespoons active dry yeast
1 cup milk
1/2 cup butter
2 eggs

In a small pot, heat the milk and the butter. Remove from heat and cool until it is warm enough for you to put your finger in for ten seconds without burning, between about 86 and 103 degrees for you technical types. It is VITAL not to use the milk while it is too hot, or you will kill the yeast and your dough will not rise. While the milk and butter are cooling, in the bowl of your mixer combine the 1-1/2 cups of the flour, all the yeast, and the sugar and the salt. Attach the mixing paddle. Turn the speed to one and slowly add the milk and butter mixture, then add two whole eggs. Mix to combine and then raise to medium speed and allow to mix for about three minutes. This starts activating the gluten in the flour so you’ll get a nice texture. Okay turn off the mixer and then change from the mixing paddle to the dough hook. Add two cups of flour and start the mixer on LOW speed unless you want to have flour in your face, eyes, and up your nose. Allow it to work in and see if the dough starts coming away from the sides of the bowl and creeping up the dough hook. If it is too sticky, add more flour about a 1/4 cup at a time. The dough should be slightly tacky but not too sticky. It is more towards a firm dough than a loose dough. When it looks good, allow it to mix in the mixer for about ten minutes. This saves you from having to knead it by hand. Go have a latte or something….

Okay, turn off the mixer, remove the dough from the hook, scrape all the dough out onto a lightly floured counter, and knead for just a few minutes to bring it together into a nice ball. Place in a greased bowl, grease the top and sides of the dough ball nicely, and allow to rise undisturbed in a warm place for probably at least an hour. This is not a super-fast rising dough and you do want to give it time to work. It should be doubled in size when it is ready.

Punch it down and plop it out onto a floured surface. Flatten it as best you can with your hands and then grab the rolling pin and be ready for battle! You will need to roll this out to about a 12×12 square or 14×12 or so. I actually didn’t measure but just went with what looked right. The dough will want to spring back so you’ll have to put some muscle into it.

For the next step, melt a stick of butter, and get out cinnamon and sugar and raisins (if you like raisins; if not, just omit. Also, you can toss in ground walnuts or pecans also). Using about 3/4ths of the melted butter, pour it on the dough and then lightly spread it with your fingers so the entire face of the dough is covered. Sprinkle liberally with cinnamon, sugar, and nuts; toss raisins on. Then you start to fold the dough away from you until it is rolled up. Now, my mom used to make something called a tea ring, which means she did up to this point, then made a circle of the dough, tucked it in on the ends, then snipped about 3/4ths of the way through all around the ring, laying over the pieces like flower petals. You can do that, or do like I did and cut out 12 cinnamon rolls. Place on a 1/4 sheet pan. Brush with some of the leftover melted butter. I boiled a kettle of water and then poured the hot water into a deep pan and put it on the bottom shelf of the oven (turned OFF), then put the rolls in this steamy environment to proof until they are doubled in size. Take them out – gently so as not to bump and deflate them! – then take out the water pan and heat the oven to 350 degrees. When it is at the proper temperature, put in the rolls and bake for about 15 minutes (check at 13 to see if they are done in case your oven runs a bit hot). Bake until light brown on top and then remove from the oven. Allow to cool for about fifteen minutes. I used store-bought (gasp!) cream cheese frosting on mine because I happened to have it in the cupboard but you can make your own or make a simple powdered sugar glaze. Frost or glaze the rolls, then step out of the way because your family WILL trample you on the way to get them.

Bil hana wa shifaa!

Published in: on September 28, 2011 at 9:57 am  Comments (2)  
Tags: , , , , ,

Split Pea Soup with Potatoes

Well, winter weather is not yet here,  but it’s not too hot so I decided to make a big pot of split pea soup.  It’s actually very easy and makes a nice meatless meal.  Here’s what you need:

1 pound bag dried split peas

1 medium onion, diced

1 tablespoon garlic, chopped

1 pound of potatoes, waxy or russet, peeled and diced

2 teaspoons olive oil

salt, pepper, and spices to taste.

Heat oil to medium.  You want to gently sautee the onions until translucent, not brown them.  Add the onions and stir to coat.  Let them cook for about ten minutes, stirring occasionally, until soft and translucent.  Add garlic and sautee for five more minutes.  Add potatoes and peas, then add water to cover plus about one inch.  Add salt and pepper to taste.  I also add 1 teaspoon ground cumin, 1/4 teaspoon turmeric, 1/4 teaspoon mild chili powder (my kids can’t handle the heavy-duty stuff) and one chicken bouillon cube.  Bring to a boil then lower to a simmer and cook until the peas are broken down and the potatoes are tender.  Waxy potatoes will hold together better if you want them to be distince in the soup; mealy ones like russets will break down more for a thicker soup.

You can serve this on its own with some toasty bread, or over rice, or, if you are a starch fiend like my husband, both.

Bil hana wa shifaa!


This slideshow requires JavaScript.

Published in: on September 13, 2011 at 7:55 pm  Leave a Comment  
Tags: , , , , ,